To create a new Source with AdPush type of integration, please go to the Channles section, choose the Channel and click on button.
The process of creation consists of 4 steps: filling in the Basic settings, Advanced settings, Tag constructor and Align Demand.
Basic settings
When it comes to the feed creation, the first step to do is to pick AdPush as an integration type (1) in the basic settings of the source. Once done, the name of the feed needs to be filled in (2) and, if required, source description (3). The next important thing to do - is to pick an environment (4). You should pick the one that will be sent by your supply partner. Please keep in mind that it can’t be changed after creation.
Right under, Sensitive Supply toggle (5) is located. When enabled, gives you an ability to “lock” specific source of being selected in the Align Supply tab. According to that, demand can be aligned only from the inside of this entity. For instance, you have “locked” source #123456, hence it won’t be displayed in the Align Supply in campaign settings, even if it suits pre-filters picked. Demand can be connected to this source only from the Align Demand tab in this source’s settings.
On the right side of the page there is a feed tag type (6) located - it can be either JSON or XML. The feed URL will appear after the source is created.
Response Template and No Response (7) stands for the template we will respond to the publisher with. Can be customized to any way that is required by your supply partner.
Once the general information is set, the pricing model needs to be picked. With the AdPush integration type, we have only Share of revenue (8) available. The default percentage is being taken from the settings of the corresponding channel. In this field you set the percentage that will be received by your supply partner. However, it can be overridden using the checkbox.
In the top right corner, there is a Status (9) button, which allows you to enable, disable or archive the campaign.
Advanced settings
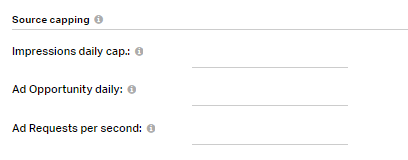
Looking into Advanced settings, Source capping allows you to limit the volume of Impressions, we could receive from a particular publisher/supply partner along with the overall volume of incoming Ad Requests per second and Ad Opportunities coming from the publishers' inventory. The volume of Ad Opportunities and Impressions can be limited by specific time period: daily (per 24 hours).
Targeting
With the help of this section you are setting up the different targeting options for your supply feed. This feature allows you to target your audience by Domains (1), SubIDs (2) and Countries (3). As an additional option we have a Remap Lists (4) targeting available.
The Create New List (5) button, once clicked, redirects you to the list creation tab.
Once everything is set up, click (6) button to move forward.
Tag Constructor
Tag Constructor tab allows you to add relevant parameters to the feed URL by simply clicking on them. If you want to exclude specific parameters from the link, just untick them.
Align Demand
To finish the creation of the Feed, don't forget to align demand to the Source. To have it done, go to the Align Demand tab (1), use pre-filtering zone to pick required demand feeds and select campaigns using the tick buttons on the left (2). Once done, the button (3) will appear and let you align the demand to created source.