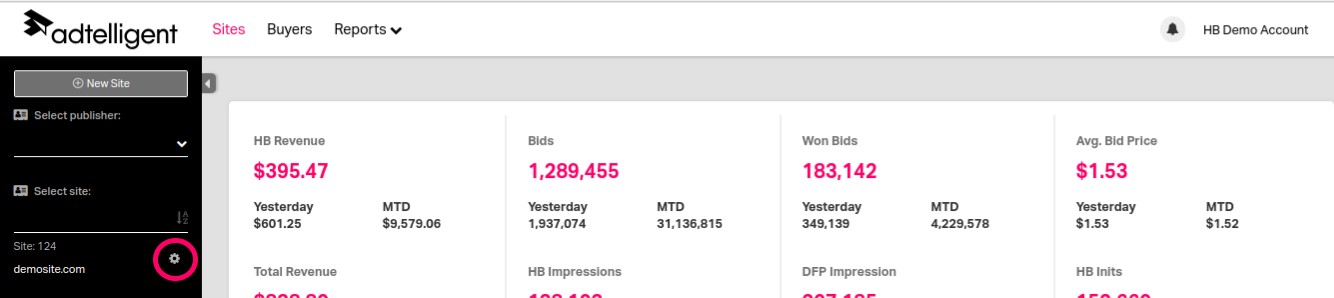
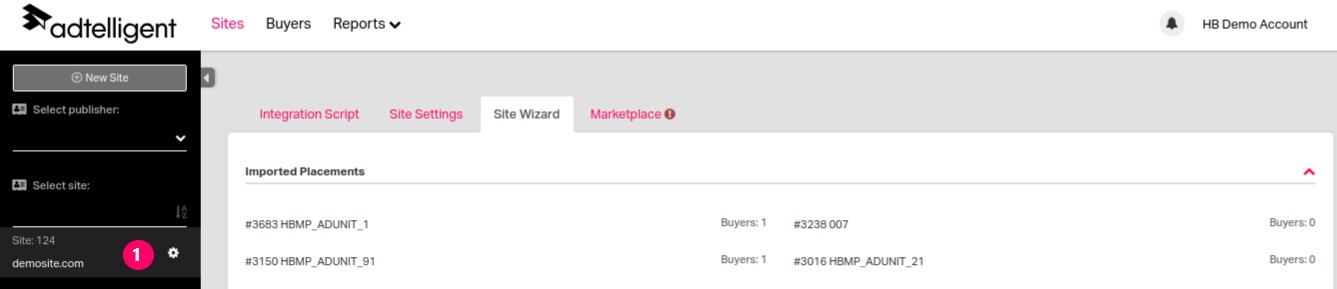
To edit an existing Site, click the Cog wheel next to the Site's name.
Integration Snippet tab:
Once the New Site is created, you will see the new section - with the name of your Site without consent:and Integration snippet at the top of the page. This Integration snippet (1) is unique to this site and is the same for all AdUnits located on this site. This is the only piece of code you will need to add to your website to complete the integration with HBMP platform.
UAM Friendly (2) — enable this option if you have Amazon A9 integration.
Here you also have the ability to enable Test Mode (3). By enabling Test Mode, you will be able to set the % of the traffic you would like to test on.
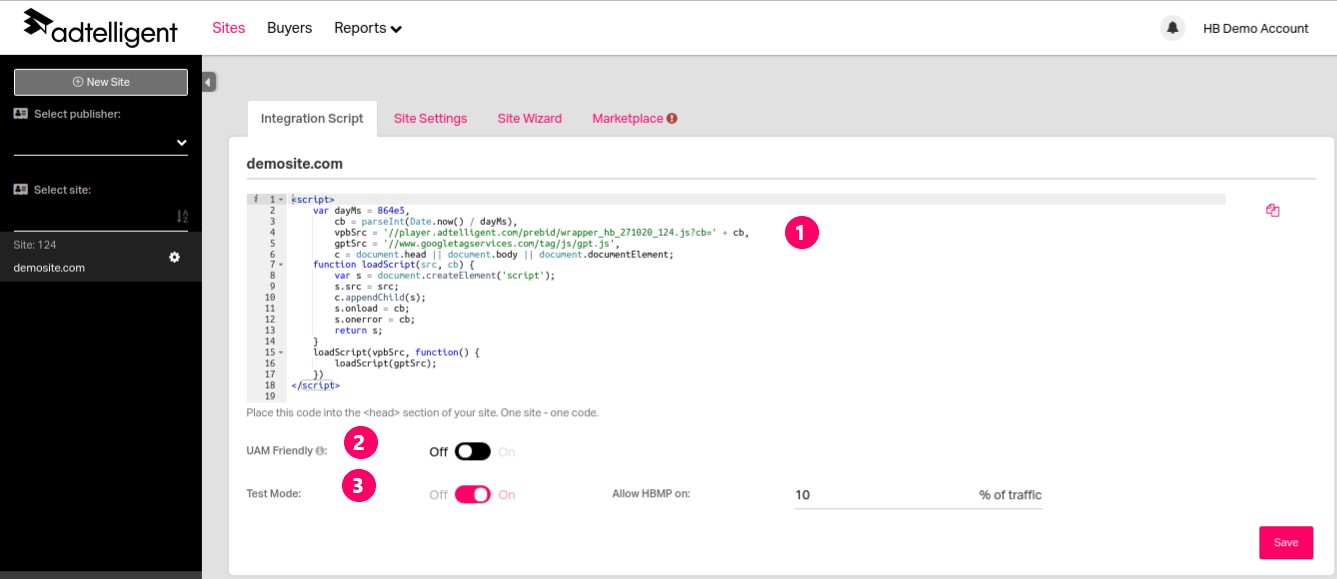
Note: Click here to find out more about how to integrate the script to your publisher's webpage.
Site settings tab:
In order to complete the setup, you must now choose a price granularity (1) in order for the HBMP to push line items into the connected Google Ad Manager (DFP) account.
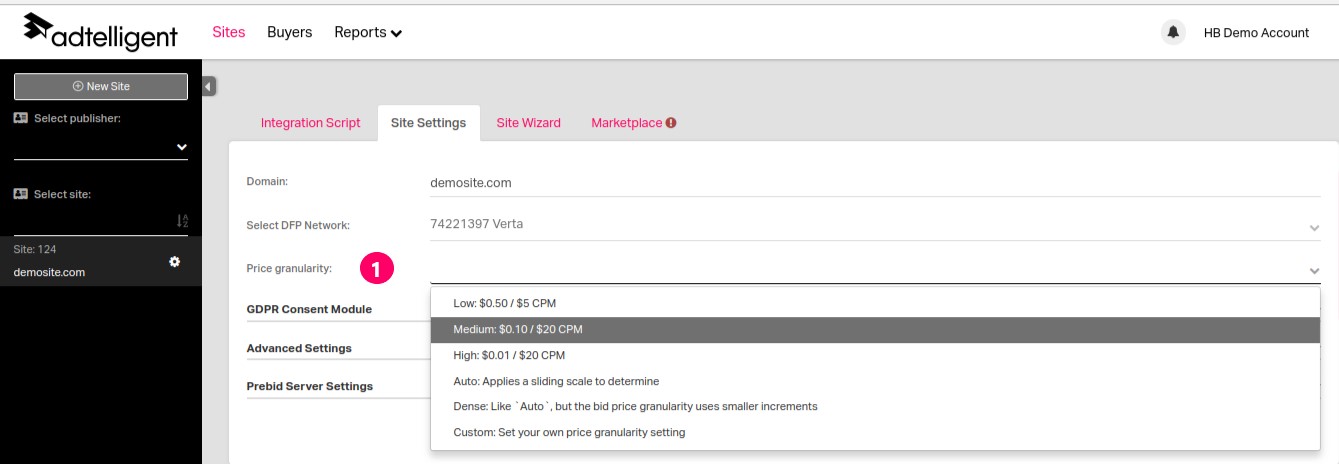
Price Granularity – Where you will decide how broad or granular, by price, you want HBMP to create your line items at.
Low: $0.50/ $5 CPM
Medium: $0.10/ $20 CPM
High: $0.01/ $20 CPM
Auto: Applies a sliding scale to determine
Dense: Like "Auto", but the bid price granularity uses smaller increments
Custom: Set your own price granularity setting
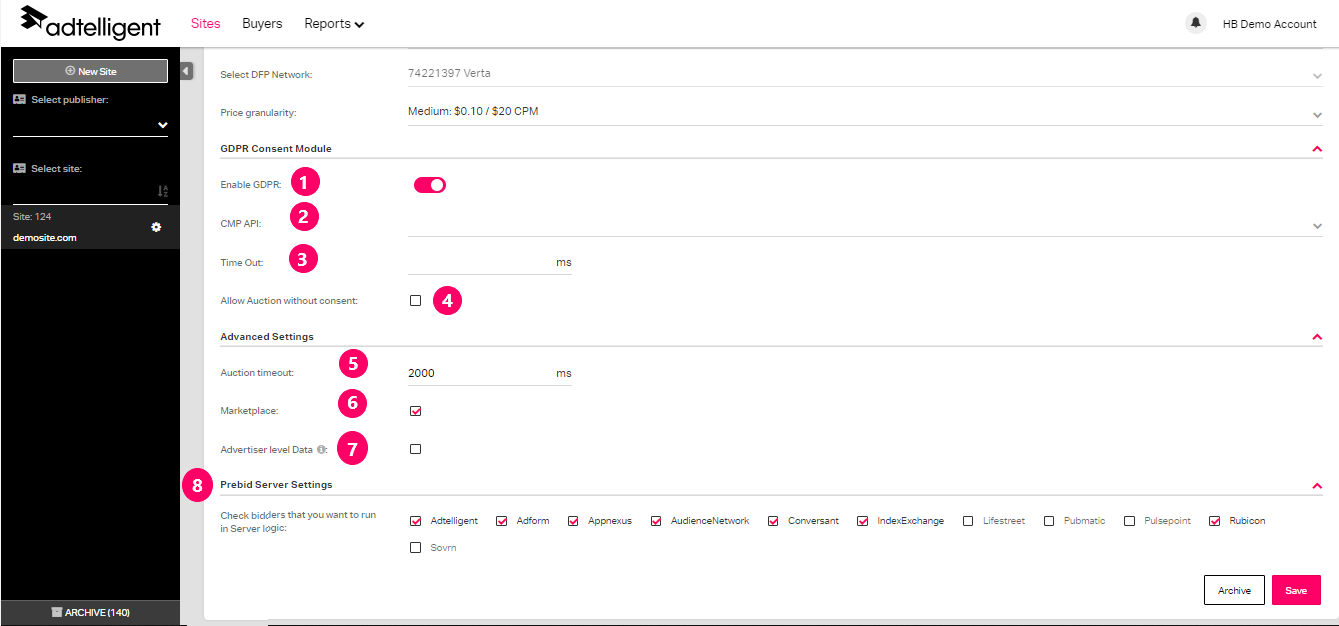
GDPR Consent Module (1) — by enabling GDPR, you will be able to collect User’s Data by means of cookie taking their agreement.
CMP API (2) — select the consent management provider for General Data Protection Regulation from the drop-down list.
Timeout (3) — select the value of GDPR timeout. This value determines the maximum allowed time for receiving response from selected CMP API.
Allow auction without consent checkbox (4) - put the tick mark here if you want to allow auction without consent.
Auction Timeout (5) — select the value of auction timeout. This value determines the maximum allowed time of the auction on the site.
Marketplace (6) — put the tick mark here if you want to use Adtelligent Marketplace (Adtelligent demand).
Advertiser Level Data (7) — if checkbox is checked, you will be able to get the information about advertisers who mostly buy placements (on which domains there are final transitions above all). You can find this information in Reports on Advertiser domain tab. Please, note, that it takes some time for collecting data.
Prebid Server Settings (8) — you can select bidders which you want to run in server logic.
Site Wizard tab:
In the Site wizard tab you are able to see all placements that are imported from your site (1).
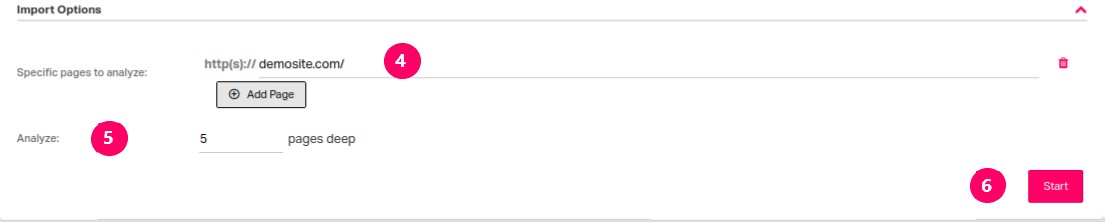
You can use Import Options (1) to parse slots from your site automatically.
Specific pages to analyze (2) — click on the Add Page button (3) and specify the site (4).
Select how deep analyze (5) do you need and click on the Start button (6).
Than you will be able to select slots you want to add.

Marketplace tab:
Marketplace status (1) — status of vendors in Ads.txt. On this tab you can see vendors that should be included to your ads.txt file.
